Showing posts with label DIY. Show all posts

Wednesday, October 16, 2013

Our {Fake} Campout

Fall weather means it's time to spend as much of your life outside as you can! But being the technology junkies we are it means, moving things you love like Alabama football games and The Wizard of Oz outside with you.

Enter homemade drive in movie theater.


Here's how we did it, not rocket science. And it cost $0, because everything we needed we found around the house.

1 piece of plywood, laying in the attic. 1 white bed sheet, stuffed in a box in the attic. And a staple gun. That was our "screen"

Then I found hooks and metal rings in the basement that attached to the porch decking to hang the screen up.

Then we hooked up our projector to our laptop and voila!


And now that we have the set up, we are looking for every opportunity to get outside in nature and watch TV.

Like a kid's first "Wizard of Oz" experience!

 But this time I ramped up the outdoorsy experience. I added a fire pit, hotdogs on a stick and marshmallows for roasting! That's downright camping y'all. I mean, as long as you define camping as having a bed, blankets, access to a fridge, bathroom and wireless internet, right?


I think I earned a merit badge on this one, for reals.


Thursday, September 19, 2013

DIY:: Home Decorating

We are slowly but surely updating the decor in our home. You know how you just need a fresh look every once an awhile?!?!

So here's what we've done so far, some rooms are close to done, some rooms only have one step.

Bedroom:

Our bedroom got a fresh look using old ideas. We purchased a mid century modern bedroom set from an antique store and it made the room SOOO much better! Turns out giant furniture from the 21st century just doesn't fit a tiny room built in 1922. The lower profile furniture looks so much cleaner and the room looks more spacious!

So of course I don't have any before pictures cause I'm a great blogger like that. But here is our updated (vintage) bedroom:

Chest of Drawers


Side table ( I spy little lambs....)

Console Dresser
Still looking far a few wall accents for this room. But other than that it's done for now!

Next two rooms is just a sneak peak. The official revel will be by the end of September.

Here are some hints from what's happening in the dining room.

It may be a new color
New chairs are involved...

And some great new lamps
Up close


And a brand new, antique, china cabinet ( I spy missing French Doors)
This is what is so hard about decorating for me....it is a process. Unless you have A LOT of disposable income and you can just open a West Elm catalog and buy every piece in the room, it comes together pretty slowly. We have learned from some very gracious friends (hm hm Lara and Aaron) that it takes patience and "just trying it out" to find out what really fits in a room and what should be returned. Even if you have to return 18 curtain panels and an 8 x 10 rug.

So last set of sneak peak pics are of our guest bedroom, that may or may not contain our future Mid Century Modern buffet ( if my massive Art Deco monster ever sells on Craigslist, I'll move it to it's rightful place in the dining room). 

New bed and new bedspread


I spy a rug that needs returning!

So thats my horrible post about our decorating journey, that is far from finished. But we are beginning to see the end....


Friday, July 19, 2013

DIY:: Home Updates

As you know, we live in an old house. Which makes quick fixes that normal homeowners take care of on a Sunday afternoon, giant ordeals to us that have to wait till I have summer break. 

Take this minor hole from an old towel rack that had fallen out of the wall.  Just get a quick wall patch kit and fix it right up you say? What you can't see from the picture is these walls are plaster. So when I used the good ol' patch kit, it left me with a bumpy mess!


YUCK! The patch just wouldn't lay flat. I pulled it down and repatched with just plaster the second time.....slightly better


But now the problem is, I don't have the paint to cover it up, so I have to repaint the whole bathroom now. Another project for another day.

What I did paint on the other hand was Wesley's bedroom dresser. The white drawers where looking a little grimy, so I did a quick coat of rose pink and ta da!

This project went much smoother.

And finally we installed a new dining room light. I have never really liked the chandelier in the dining room, but it's not that offensive so it's taken me 4 years to replace it.

This is the best picture I could find of it, because I (of course) forgot to take pics before I took it down.

Like I said, nothing really wrong with it, just not my favorite. And we have gone pretty vintage in the dining room, with an art deco buffet, several mid century modern serving pieces and a early twentieth century piano. So the modern light fixture just didn't fit in.

Luckily I found a light I did like at the Habitat for Humanity Restore for just $7! I figured it was worth the risk for that price!

Here's Matt installing it in his work clothes because I had started installing it 10 minutes before he came home, thinking it would only take me 10 minutes....not so much. Nothing in our house takes 10 minutes.


All in!


Closer look

Detail 

So this is only 3 projects done (ish) from a list of at least 14! Some being as small as replacing dead outlets, some as big as wanting to knock down a wall in our kitchen. I have just run out of summer, and run out of will power to get in over my head.

What do you think? Any hints on how to get better at "This Old House"? Maybe don't start projects at 5:50pm? Hire professionals?


Tuesday, May 21, 2013

Grit n' Grind Made Girly

You already know we are big Grizzlies fans. And you are also aware we have the prissiest little girly girl ever. Well, sometimes being a sports fan and a princess is hard. In a world of oversized t-shirts and jerseys sometimes you just need a good ruffle, am I right? So Mommy intervened.

I started with an XL Grizzlies playoff shirt from last season that a sweet friend donated to the cause.


Then I sliced off the sleeves. (sorry I forgot to do step by step pictures, but you can find this idea on Pinterest OR just picture it in your head, it really is too easy to do.) 

Then I cut a straight line across the top directly below the neck hole.


Then I hemmed the arm holes and sewed them together a bit to make the opening smaller. I folded the top over and sewed straight across to make two columns to feed the ribbon through that became her straps.

I also got a coordinating piece of Grizzlies blue fabric and made a ruffle that I added around the bottom

And, Ta-Da!


Look how happy she is, the picture is blurry because she wouldn't stop twirling in it!


Sassy pants.


Go Grizz!

Saturday, October 20, 2012

Counter Offer

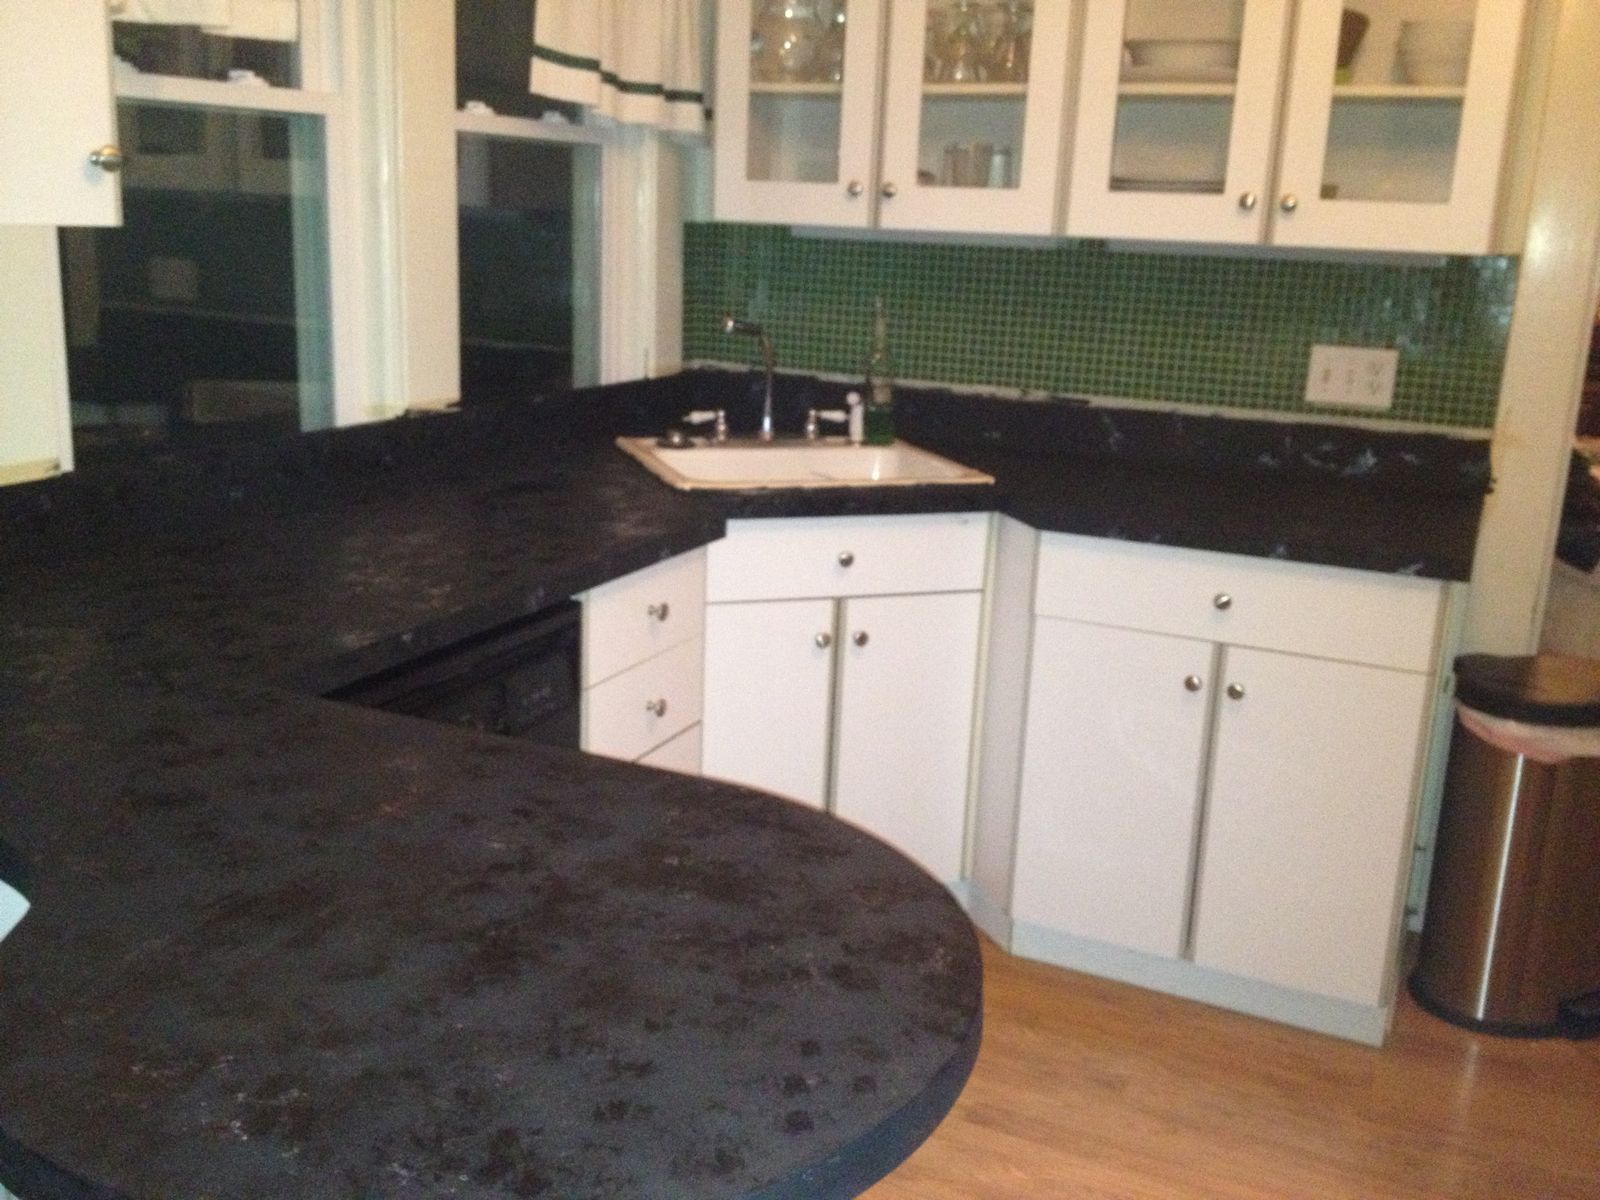
When we bought our house 3 years ago we sat down and made a list of things we wanted to do to it. The usual, paint rooms, replace fixtures, landscape, have 33 double hung windows installed you know normal list. Most things were inexpensive, tedious home improvement projects we just wanted to do to make the house more our own. And we plowed through the list one by one, even the windows. But one thing that was on the list that kept not getting done was the kitchen counter top update. Mostly because it was something I did not know how to do myself, or so I thought.

I had heard a rumor of people who were brave enough to paint their old laminate, formica counter tops. And then I saw it pinned on pinterest.

It was only $60 and it would take approximately 2 days and it transforms my old, ugly counter tops into granite {ish}!

Here is my thought process--I don't like the counters now--I can paint them to what I want for only $60---If I screw it up I get to buy new counter tops--win/win!

So here is my Giani counter top adventure!

First I scrubbed the counters down with an SOS pad and taped off the trim.


Then I told my little house guest I was going to paint the kitchen counters, but by the look on his face when I started I don't think he believed me.


I put on one thick coat of the primer and the journey had begun!

I already liked it better than the blah grey! And this was just the matte black primer.

The next step was the marbling effect with "mineral paint" And this is when I got really nervous. I mean I can roll a paint roller, but be artistic with a sponge...not so much...but the handy dandy video tutorial assured me it was foolproof, just start sponging and layering. So I did.


Ummmm, it was awful. Like really, really bad. I was devastated. I started researching granite costs and home improvement loans. I mean, it looked like Wesley got into paint and just hand printed all over our counters. But the more I did the worse it got. So Matt convinced me to leave it alone and let it dry. I proceeded to scour the internet for tutorials to fix this mess. And I discovered the key was more layers. It was going to be like camouflage, not patterns. So I started again. And it started looking good, like really good, like granite!


Final step, seal it. This step also threw me a few curve balls. When I rolled on the poly it made a texture, where before the counters had been completely smooth. And of course real granite is stone smooth so texture was ruining my fake granite. But poly shows every single bump, which includes the bumps you make when you layer 50 coats of sponged on mineral paint.  My genius plan was to use a foam brush with the second coat, to smooth the top coat out, yeah all that did is create very visible streaks. So here was the scary thing, it said only do 3 coats and even if I wanted to more, I was running out of top coat, so this 3rd time I had to get it right. I used steel wool to even out the brush marks and made peace with the fact that this was not real granite it was a can of paint and there would be a few bumps and rolled on my last coat. No luck, I didn't have enough poly to finish and everything looked uneven. BOO. I was back on Lowes.com putting in my kitchen measurements and scheduling estimates. Again, my level headed, calm, supportive husband stepped in {after rolling the dry poly with a wet roller, but that's neither here nor there}. He assured me 4 coats would work, he went to home depot and got me a new can of top coat and rollers, came back and finished our beautiful counters. Hero!


 Ta da!!!!!


Wes approves!

A few close ups:


You can kinda see the texture in the close ups. But we've lived with it for a week now and I can tell you truthfully, I don't notice it at all. Now that it's a functioning kitchen with all the appliances and decor back on the counters, it just looks like a shiny black marble surface {That shows every tiny fingerprint, but so would granite!}

We are super satisfied, even if we did try to screw it up every step of the way!